The different industries of construction, manufacturing, aerospace, and automotive-engineering all need the knowledge of tensile strength. It is a necessary property that not only tells the behavior of the material under stress but also tells the basis of laws for designing and considering the functional presence of thousands of structures and products. But then, what is tensile strength, and how is it measured? This article goes into details about how the tests for tensile strength are done and at K factors may affect their results. Be it an engineer, a researcher, or a mere material science enthusiast, the guide should stoke one’s interest as it unfolds into the significance of tensile strength and how the world is built upon materials defined by it.
Understanding Tensile Strength
Definition of Tensile Strength
It is the maximum quantity of stress that a material can bear while being pulled or stretched before it breaks. It is one of the crucial parameters of material science as it talks about the capacity of a material to withstand deformation and failure under tension. Tensile strength is typically expressed as force per unit area and can be counted into Pascal (Pa) or pounds per square inch (psi).
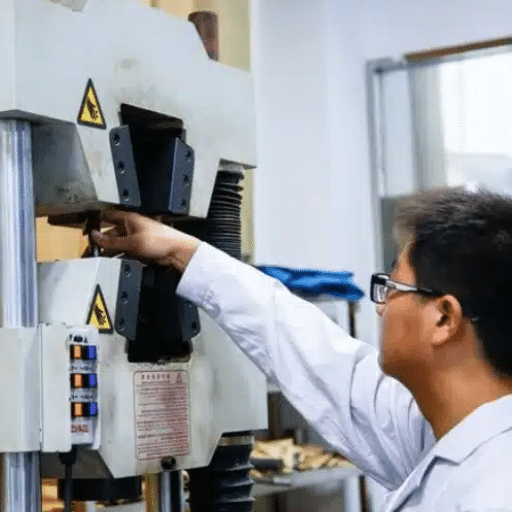
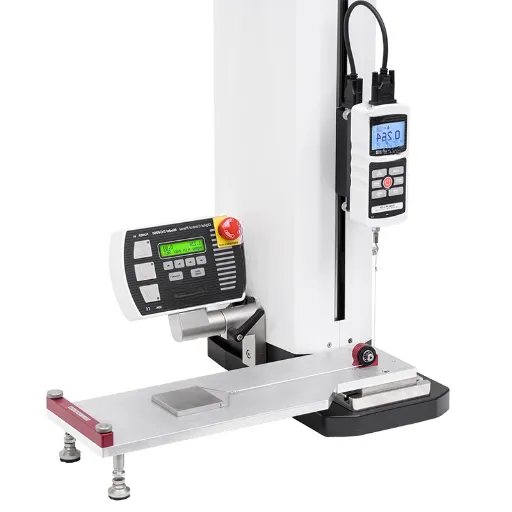
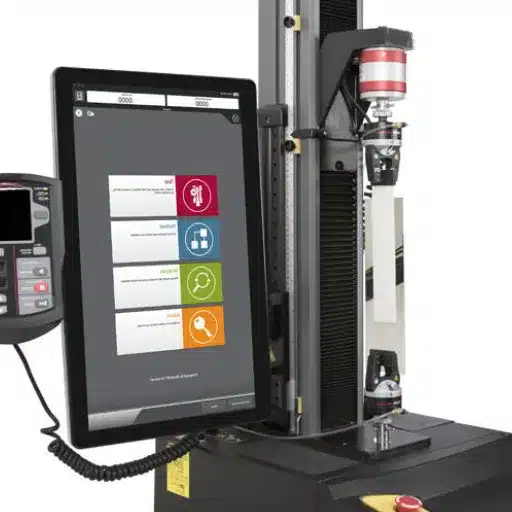
The testing machine and process to obtain the tensile strength is the tensile tester. It imparts a controlled force to a sample material with tension steadily increased until the material fractures. Besides presenting the fracture point of the material under testing and the elongation at fracture, the test furnishes supporting data to assess the mechanical properties of a material and ascertain its suitability for a certain purpose, be it for construction or manufacturing.
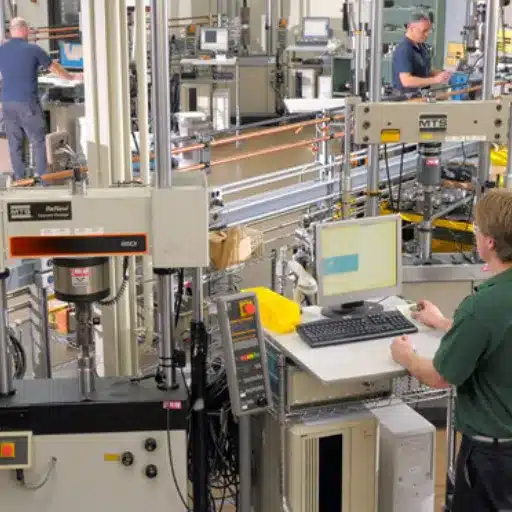
Such tensile testing machines find application in industries where reliability and safety of materials become paramount. Measurement of tensile strength by these machines allows engineers and researchers to decide on the material choice that will enhance product designs and meet industrial standards. Therefore, the testing supports making wear-resistant materials in everyday life construction, vehicles, and tools.
Types of Tensile Strength
Tensile strength is a determination of the pulling force that a material can resist without breaking or failing. These generally divide tensile strength into three groups:
- Yield Strength: Yield strength of any material is the degree of stress that it can endure before undergoing permanent deformation. It is a very important factor when materials are being used for different applications where any kind of elastic deformation might actually cause some structural deficiencies or inaccuracies.
- Ultimate Tensile Strength: The ultimate tensile strength is the maximum stress a material can bear while being stretched or pulled before breaking. It is equally important in determining the capacity of a material to hold a load and is generally used to compare which of the two materials is stronger.
- Breaking Strength: Breaking strength is the level of stress at which the material actually breaks or fractures. It ends tensile testing and searches for the material’s rating for high stress applications.
With an understanding and measurements of these various tensile strengths, industries can make sure that materials meet the safety and performance standards required in their own applications.
Ultimate Tensile Strength Explained
The maximum stress that a material may withstand while stretched or pulled before rupture is called ultimate tensile strength (UTS). It is a parameter of interest in material science since it is useful in defining the performance of materials under high-stress conditions. UTS is computed by dividing the maximum load applied during a tensile test by the original cross-sectional area of the specimen.
Materials with higher UTS generally have better resistance to breaking under force, making them suitable for applications where durability and reliability are required. For example, metals like steel have a high UTS and are thus used extensively in construction and manufacturing. Conversely, materials with a low UTS, such as plastics or certain composites, may be used in light-duty applications.
Understanding UTS and its measurement is important in the industry and for assuring safety and performance. It aids in materials selection for various applications, such as the building of bridges or the production of medical devices and consumer products. An understanding of the ultimate tensile strength lets engineers and designers decide on designs and materials that meet safety requirements and operational needs.
Factors Affecting Tensile Strength
Material Properties and Composition
Parameter options for material properties and composition play an instrumental role in determining the tensile strength of a material. Such factors that contribute to the physical behavior of a material include the type of material, microstructure, surface conditions, and chemical composition. For example, metals with alloying elements highly concentrated, such as carbon in steel, tend to have higher tensile strength as the atoms are bound together more strongly.
The microstructural considerations, such as grain size-optimal grain distribution within the volume of material, directly affect tensile strength. Fine grains provide higher tensile strength as they create a larger number of grain boundaries, which act as hindrances to dislocation movement under stress. Whilst coarser grains may slight decrease the tensile strength, they might promote other properties such as ductility, ending up in needing to favor targeted manufacturing processes depending on the application.
Also, impurities and defects within the material may reduce its potency in tensile properties. Internal defects such as voids, cracks, or inclusions create points of stress concentration, which can cause premature failure when under load. By controlling material purity, manufacturers can control and improve the reliability and performance of materials in tensile applications.
Influence of Grain Structure
The grain structure has the most essential role in how a material behaves during a tensile test. Grain size and grain orientation significantly affect strength and ductility of the material studied. For fine-grained materials, the tensile strength tends to be higher because of the grain boundary strengthening mechanism; namely, these boundaries act as barriers for dislocation movement and resist deformation. Generally, coarse-grained materials might have lesser strength but higher ductility, that is, they accommodate more deformation before failure.
Other characteristic features dictated by grain structure are anisotropy or the variation in mechanical properties brought about by the direction along which load is applied. Materials with grains preferentially aligned, usually by processing routes such as rolling or extrusion, exhibit non-uniform tensile properties. For instance, along the grain alignment direction, tensile strength is high whereas it is low perpendicular to the alignment. This consideration emphasizes the need to control grain orientation during manufacturing to impart uniformity to tensile application performance.
Further, heat treatment methods of material manufacture modify grain structure and consequently the outcome of tensile tests. Annealing may bring grain distribution to a uniform state to enhance ductility, while the dual action of quenching and tempering may refine grains to develop strength and toughness. Through such methods, it is possible to tailor the grain structure in such a way that materials are refined for a particular tensile need. Hence, one must consider grain structure control while seeking strength-flexibility relations during tensile testing.
Temperature Sensitivity
The temperature factor has much influence on the yields of a tensile test. At higher temperatures, the materials tend to be more ductile and thus will exhibit a decreased yield strength and ultimate tensile strength. At the lower temperatures, ductility usually decreases while brittleness sets in so that the performance of a material under a test is differently affected. This setting is essentially how temperature sensitivity affects the mechanical behavior of a material, which then stresses the importance of ensuring environmental control during the test to secure result accuracy.
Another factor affecting tensile testing is the strain rate with which the test is carried out. Higher strain rates in general set materials to behave in a more brittle manner, increasing resistance to deformation but losing the balance of ductility. Conversely, at slow strain rates, materials tend to show more plastically deformation and thus give information to ductility and toughness, which are viable. Hence, strain rates should be set so that they match testing standards to give an appropriate effect.
The composition and microstructure of materials also play a fundamental part in the outcome of tensile tests. Variations in the grain size, phase distribution, or heat treatment history could affect the mechanical properties to a great extent. For example, fine grains can impart higher strength because of the grain boundary strengthening effect while coarse grains can have the effect of enhancing ductility. Materials should, therefore, be properly prepared and tested by procedures established for each material with its specific characterizations to avoid discrepancies in test results.
Tensile Test Methods
Standard Test Methods Overview
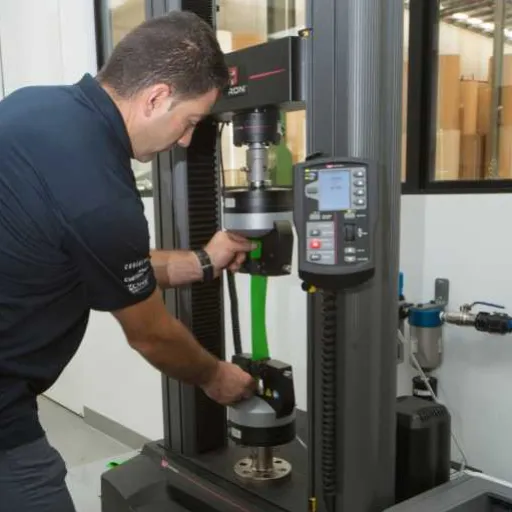
Tensile testing is a basic mechanical testing method utilized in determining how a material is responsive to applied forces. It gives data related to tensile strength, yield strength, elongation, and modulus of elasticity. This information is used to judge a material’s fitness for any given application. It is necessary to have a standard test to ensure the consistency and reliability of results irrespective of the place of testing, or how the test is conducted.
Key Standards:
- ASTM E8/E8M – Standard test methods for tension testing of metallic materials
- ISO 6892 – International standard for tensile testing of metals and metallic alloys
ASTM E8/E8M and ISO 6892 are the next most widely followed standards for tensile testing. They outline procedures to be used and for sample preparation and testing conditions to be followed when testing metals and metallic alloys, with greater emphasis on setting out the dimensions of the test sample, methods of gripping, and strain rate to allow reproducibility of results. Under these standards, any differences due to the way the operator conducts a test or the setup used can be kept to a minimum, hence allowing for a common basis for comparisons between different studies done by other people or in various industries.
The tensile test is conducted by holding the prepared specimen in a tensile testing machine, and subjecting it under an increasing uniaxial force until it collapses. Such performances as maximum force, elongation at break, and percentage reduction in cross-sectional area of the specimen are measured; these data give useful insight into the mechanical behavior of the materials concerned and allow engineers and researchers to make decisions in material selection and design considerations.
Testing Procedure and Equipment
The testing procedure begins with specimen preparation of the material, using standardized specifications to maintain uniformity for accuracy of results. The specimen is mounted on a tensile testing machine, and a uniaxial force is applied. The force is gradually ramped up as relevant parameters, like load and elongation, are recorded and monitored continually until the specimen breaks. This process yields important information such as maximum tensile strength, elongation at break, and diminution in cross-sectional area, all of which are considered very important in analyzing material behavior under stress.
Essential Equipment Components:
- Load cells – Measure applied force to specimen
- Extensometers – Measure deformation/strain during testing
- Digital interface – Real-time data collection and analysis
- Specimen grips – Hold test material firmly during testing
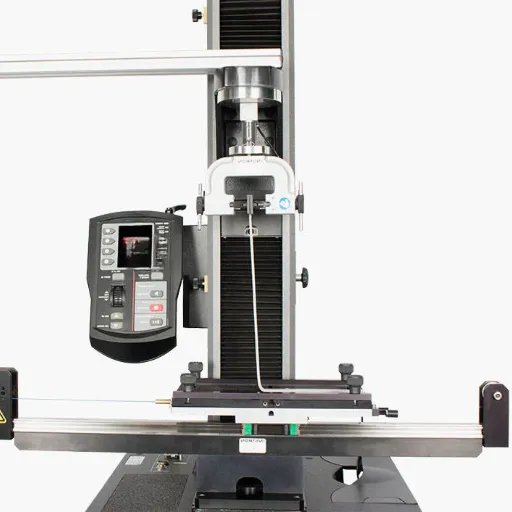
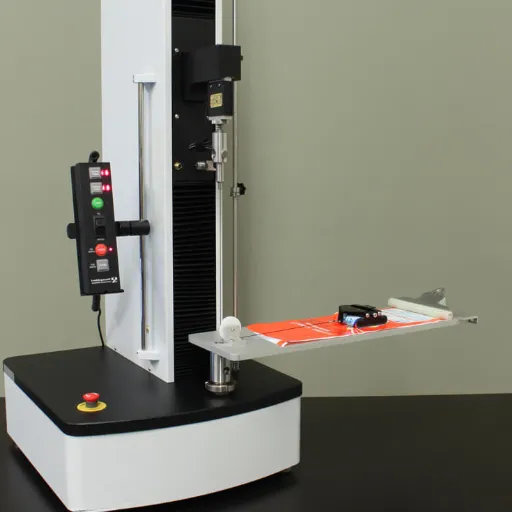
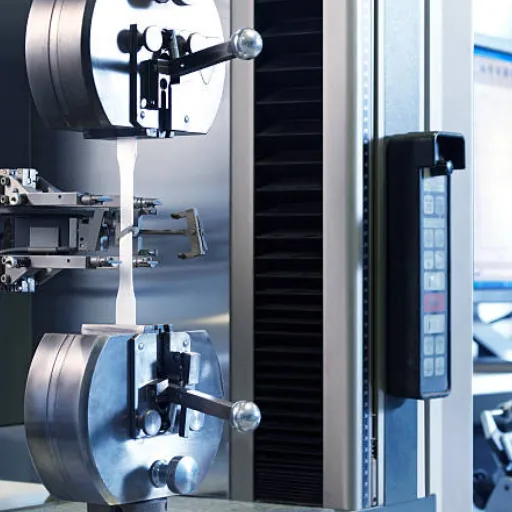
Tensile testing machines fitted with a variety of load cells and extensometers constitute the test equipment. The load cell measures the force applied to the test specimen, whereas the extensometer measures the deformation/strain that the test material undergoes during the test. Besides these major components, the machine is likely to incorporate a digital interface that assists in real-time data collection and analysis, thereby ensuring a high degree of accuracy and reliability of results. Another important component of the test equipment is the specimen grips, which hold the test material firmly so that no unwanted movement or slippage takes place during the test.
Calibration of the tensile equipment and its maintenance are essential ingredients for generating accurate testing results. Calibration should be done periodically to comply with industry standards and to keep the equipment performance consistent over its working life. Temperature and humidity of the test environment need to be controlled as well, as sometimes these interact with the materials to be tested. Following the related standards for routine testing as well as high standards in equipment care will drive the reliability and repeatability of test results.
Tensile Test Machine Specifications
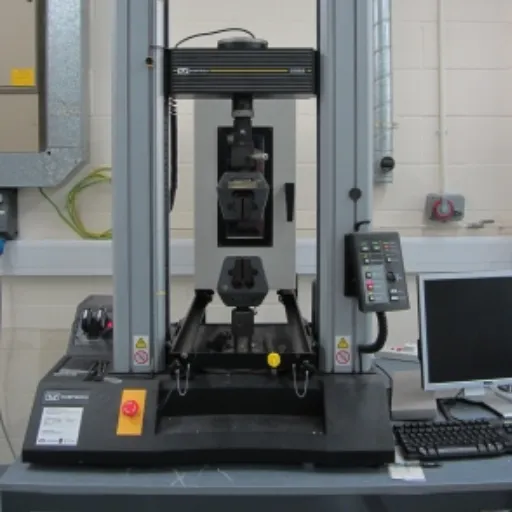
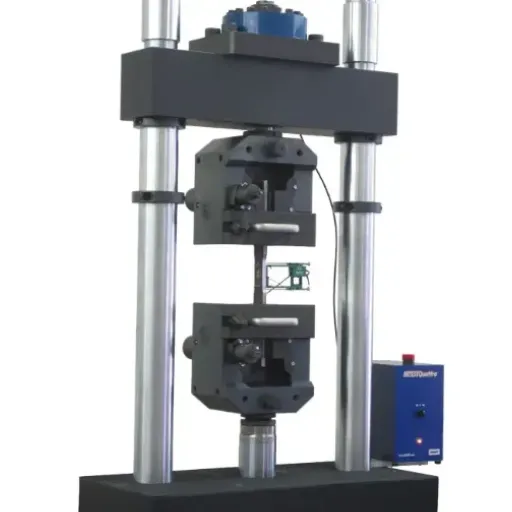
Tensile testing machines are meant to examine mechanical properties of materials in axial tension. They usually consist of a load frame, grips to hold the specimen, a load cell to measure applied force, and an extensometer to measure strain. Features usually include the ability to adjust crosshead speed, highly accurate force measurement, and data collection for real-time analysis of results. Evaluations for tensile strength, elongation, and Young’s modulus are of paramount importance.
| Specification | Description | Importance |
|---|---|---|
| Load Capacity | Maximum load machine can apply | Determines range of materials testable |
| Resolution | Smallest measurable force increment | Critical for accurate measurements |
| Crosshead Travel | Maximum distance of movement | Accommodates various specimen sizes |
Load capacity, which refers to the highest load a machine can apply to perform tests efficiently, must be considered first. Resolution in a tensile test machine refers to the increments used to measure small changes in force or displacement with absolute accuracy. The maximum crosshead travel distances, custom-fit sizes of specimens that may be tested, software for data analysis, and associated specifications may be considered as candidates for remaining considerations. The opposite applies when testers with higher load capacities are required-the finer resolution is for the testing of films or textiles with delicate force.
Tensile Test Machines should not be considered without due regard for the performance standards in accordance with ASTM, ISO, or other national, international or industrial standards and specifications. Test criteria established by standards which help guarantee precise and valid testing data make it possible to compare analytical results from different laboratories. Also, calibration and maintenance must keep pace to maintain the guaranteed accuracy and to prolong the service life of the machine.
Testing Conditions and Their Impact
Effects of Strain Rate on Tensile Tests
During a tensile test, a great strain rate influences the material properties. The tensile strength of a material usually increases with an increase in strain rate because the materials or atomic structures have less time to rearrange subjected to stress. This exhibits behavior indicating a material resisting deformation. On the other hand, lower strain rates give the material more time to adjust and develop ductility that manifests through the enhanced ability of stretching or deformation toward failure.
Material Response to Different Strain Rates:
- High Strain Rates: Materials become harder and more brittle, increased resistance to deformation
- Low Strain Rates: Enhanced ductility, more plastic deformation before failure
- Metals: Generally exhibit increased brittleness at higher strain rates
- Polymers: May harden through viscoelastic mechanisms
The effect of strain rate, therefore, also depends on the type of material. For instance, metals generally become harder and brittle with higher strain rates, whereas polymers may harden via a viscoelastic mechanism. These considerations are important when materials or components are expected to undergo different strain rates, such as in crash simulations or in high-speed machinery.
Of course, testing under a standardized method will help in ascertaining truly what the effect of strain rate is on the material tested. Tests with controlled strain rates enable laboratories to come up with data reliable enough to be cross-compared from one study to another and to existing material specifications. Such reliable comparison is essential for predicting the material’s real-world performance and ensuring compliance with relevant industry and/or international standards.
Load Application Techniques
Load application techniques present a major role in material testing towards producing exact and reproducible results. These methods relate to the application of force or pressure on a test specimen under controlled conditions. The main objective is to simulate as closely as possible the load in real life while ensuring precise information is gathered.
| Loading Method | Description | Applications |
|---|---|---|
| Static Loading | Force applied and held until failure or deformation | Tensile and compression tests |
| Dynamic Loading | Rapidly changing forces applied to specimen | Impact and vibration testing |
| Cyclic Loading | Repeated application and removal of loads | Fatigue and wear simulation |
Methods of applying loads during testing include static, dynamic, and cyclic loadings. When applying static loading, one applies a force onto the material, and it is held until the specimen dies or deforms. It is frequently employed in tensile or compression tests. In contrast, dynamic loading means applying rapidly changing forces; this is needed while wanting to understand how materials deal with impact or vibration. Cyclic loading keeps applying and removing loads to simulate testing conditions of fatigue or wear.
Besides the types of load application, it is very important that these tests be conducted under standardized protocols to maintain the quality and comparability of results. These stress-level protocols include the calibration of the equipment, knowledge of the material being tested, and control over environmental factors such as temperature and relative humidity. These measures enable us to gain more dependable insight into the material performances under variant conditions, all contributing to putting up safe and durable products.
Importance of Specimen Preparation
Various factors have an impact on the execution and results of a tensile test. One such factor is specimen preparation. A properly prepared specimen must guarantee uniformity for consistency in producing reliable results. Any deviation in dimensions, surface defect, or machining error can form a weak point where the specimen will fail during testing, resulting in erroneous data. It is thus important that accepted standards of dimensions and finish be met by the specimen to attain consistent data.
Critical Preparation Factors:
- Dimensional Accuracy: Precise measurements ensure consistent stress distribution
- Surface Finish: Smooth surfaces prevent premature failure points
- Machining Quality: Proper machining avoids stress concentrations
- Standard Compliance: Adherence to established dimensional standards
Next comes a very important factor of the environment under which tests are conducted for any material testing. Temperature and humidity do affect materials in tensile testing. For instance, polymers and composites present different mechanical properties if thermal conditions vary with time. By controlling the environment during testing, the test results can focus on the inherent materials under consideration, minimizing external influences.
Finally, the testing apparatuses and methods also hold great value. The granting with calibrated machineries and constant loading rates is necessary to confine results to precision and repetition. In the absence of such calibration, unwanted alterations in speed may modify measured values in stress and strain, thereby biasing the results. Following these procedures to the letter promotes greater reliability and validity of tensile test results.
Equipment Calibration and Accuracy
Importance of Force Measurement
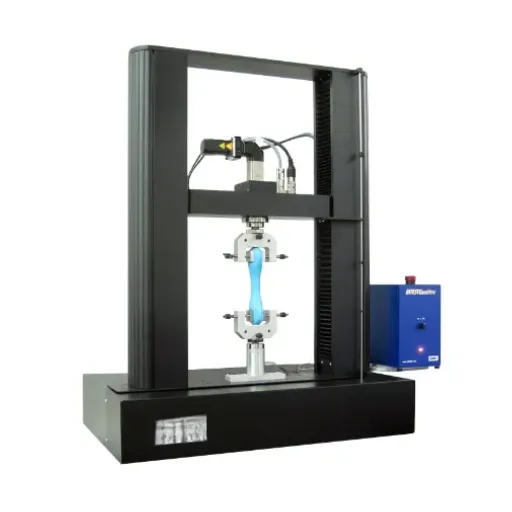
Force measurement is a very critical issue in tensile testing because failure to carry it out properly in test scenarios may risk the inaccuracy of the results. Hence, proper force measurement would allow for the precise determination of material property under stress, such as strength, elasticity, or breaking point. Without accurate data on the force involved, the product design that uses that material may have unsafe conditions when potentially interpreting the product performance.
A force measurement in the real world needs to be accurate enough, on the other hand, because of small variations in force. A system with very minute sensors and mechanisms will make sure that the application of force on the test specimen is stored with high accuracy. This high accuracy assists in repeated tests yielding same results, further supporting the comparison of various materials and quality control systems.
Making sure of force measurement accuracy reduces the chance of an error skewing data, saving time and resources. It also aids in keeping in step with industry standards, often marked by rigor in testing protocol. Force measurement ends up being critical to getting the understanding of material properties and to the development of engineering, manufacturing, and safety assurance.
Displacement Measurement Techniques
Displacement measurement means determining the distance an object has traveled or a change in the position of an object. It is essential for different industries, from manufacturing to research and development, where accurate measurements are needed to carry out operations with accuracy and quality.
| Measurement Method | Type | Technology Used | Applications |
|---|---|---|---|
| Contact Methods | Physical contact required | Mechanical measuring devices | Direct measurement applications |
| Non-Contact Methods | No physical contact | Laser, ultrasonic technologies | Delicate or remote measurements |
Some typical displacement measurement techniques are ones that require contact and ones that do not. Contact methods require the measurement technique to touch or physically intervene with the object, with mechanical measuring devices most often employed. Non-contact methods rely on laser or ultrasonic technologies in measuring displacement. The choice of method depends on several factors: from required precision to possible environmental conditions, to properties of the object.
Displacement measurement occupies an important position in services that include monitoring structural integrity, assuring precision in assembly lines, and checking calibration of measuring instruments. With selection of proper measurement techniques with maintained calibration, industries can get their job done reliably and precisely, contributing to safer and better performances for various applications.
Calibration Best Practices
Tensile testing machines must be properly calibrated to achieve accurate and repeatable measurements for measuring the mechanical properties of materials. Calibration is a process by which the components of the machine may be tested and, if necessary, adjusted to ensure that recorded values correspond to agreed standards. The regular calibration of testing machines is necessary to test for any type of drifting or deviation, should it occur, ensuring dependable results throughout.
Essential Calibration Steps:
- Load Cell Calibration: Verify accuracy using standard weights traceable to recognized measurement authorities
- Grip and Fixture Alignment: Ensure proper alignment to prevent errors in stress and strain calculations
- Environmental Control: Maintain standardized temperature, humidity, and vibration conditions
- Regular Intervals: Follow industry standards or usage intensity guidelines for calibration frequency
For starters, load cell calibration must be performed. This process is necessary to determine the accuracy with which the machine is measuring force; calibration must be performed using weights standard traceable to a recognized measurement authority. In addition, grips and fixtures must be checked to ensure accurate alignment; improper alignment during testing can generate errors in stress and strain calculation, eventually resulting in inconsistent or incorrect data, which lead to erroneous results.
Finally, calibration intervals and the environment are important factors to consider. The tensile testing machine should be calibrated always at fixed intervals, as fixed by the industry standards or by the intensity of usage. A working machine can be influenced by diverse ambient factors such as temperature, humidity, vibrations, etc.; therefore, the calibration should be performed under standardized and controlled conditions. This way, by applying such best practices, users would be assured of a reliable, safe, and repeatable tensile testing mechanism.
Frequently Asked Questions (FAQ)
Q: How does the shape of the test specimen affect its tensile strength?
Depending on the shape and geometry, the specimen shows different stresses during the tension test. These different stresses ultimately affect the tensile strength of the material. For example, with a uniform cross-section, test results are most reliable compared to testing materials with notches or irregularities.
Q: What is the importance of the tensile testing machine?
A tensile testing machine is used for the correct measurement of the tensile properties of materials. These tensile machines apply a controlled tensile force to the test piece, in which stress and strain measurements are taken from which tensile strength, yield strength, and other mechanical properties can be computed.
Q: Testing conditions affect the tensile properties how?
Testing conditions like temperature and strain rate exert a profound influence on tensile properties of a material. A material tested at an elevated temperature may register compromised tensile strength compared to a test done at ambient temperature. At the same time, a higher strain rate would mean a higher tensile strength, given that the tensile strength is inversely proportional to the time for plastic deformation.
Q: How are yield strength and tensile strength related?
Yield and tensile strengths are two very close mechanical properties. The yield strength is taken as the maximum stress at which a particular material begins to deform plastically, while tensile strength is a force term; that is it is the greatest amount of stress a material can sustain upon application of any loads which may finally cause its failure. Understanding this relation would be crucial to those moments where great tensile strength and ductility have to go hand in hand.
Q: How do different materials affect the tensile testing results?
Due to their unique microstructures and compositions, materials are said to exhibit different tensile strengths. For example, metals generally show higher tensile strengths than polymers, which tend to elongate more but have lower tensile strength. The test can have very different results depending on the use of materials selected and their suitability in practical applications.
Q: What are the common test methods for tensile testing?
Different materials are subjected to tensile tests using various methods-common test methods in use include ASTM E8 for metals and ASTM D638 for plastics. These standardized test methods ensure that preparation of the test specimen, carrying out the tensile test, and analysis of results are made in a consistent and reliable manner to determine the tensile properties.
Q: How does plastic deformation fit into tensile testing?
Plastic deformation, which is significant in tensile testing, measures how ductile and tough a material is. The tensile test subjects a material to stretching via two phases: stretching elastically, then plastically, and by stretching it to the limit of physical breaking, engineers apply parameters to describe how much a material may stretch or deform.
Q: How can tensile stress relate to tensile strength?
Tensile stress is a force acting on a given cross-sectional area on a material in a tensile test. Accordingly, tensile stress and tensile strength are such that the higher tensile stress to be borne by a material is termed as the tensile strength of the material. The importance of this relationship is to determine how a material may behave under a load.
References
- Presto Group – Top 4 Factors Affecting Tensile Strength Test Results
Discusses factors like molecular structure, temperature, and material properties. - LinkedIn – Four Factors Affecting the Metal Tensile Test
Covers sampling position, test standards, equipment, and environmental conditions. - Strata Geosystems – Understanding Tensile Strength
Explains how material composition and temperature influence tensile strength. - Medium – Factors Affecting the Tensile Strength of Materials
Highlights the impact of temperature and material softness on tensile strength.

