When it comes to diagnosing engine performance issues, precision and accuracy are paramount. One of the most effective tools in any automotive technician’s arsenal is the compression test kit. This essential diagnostic device plays a critical role in evaluating the health of an engine by measuring the pressure generated within each cylinder. Whether you’re a seasoned professional or an enthusiastic DIYer, understanding how compression test kits work, and how to effectively use them, can save time, reduce guesswork, and prevent costly repairs. In this article, we’ll explore the key functions of a compression test kit, its importance in engine diagnostics, and provide actionable insights on how this tool can help you identify underlying engine problems with confidence and efficiency.
What Is a Compression Test and Why Is It Important?
A compression test is a diagnostic method that assesses the level of pressure built inside the engine’s cylinders during the compression stroke. This test is important in defining the condition of an engine as it may highlight problems such as… worn out piston rings, broken valves or head gasket failures. By interpreting the results, both mechanics and vehicle owners can determine if an engine has adequate compression, which is crucial for effective operation, fuel efficiency, and dependability.
How Does a Compression Test Work?
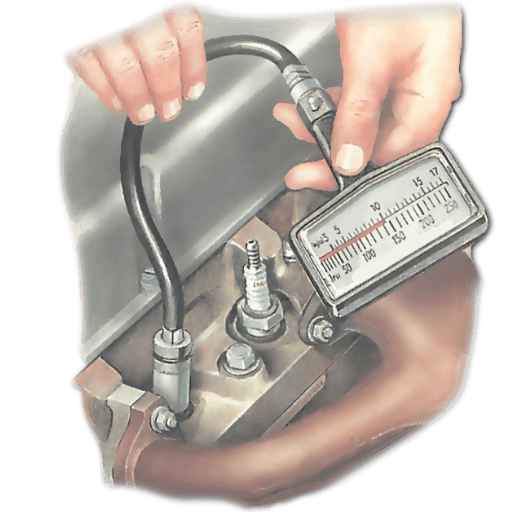
To conduct a compression test, a mechanic first removes the spark plugs from the engine to ensure there is no combustion during the process. A compression gauge is then threaded into one of the spark plug holes. The engine is cranked several times, which allows the gauge to measure the maximum pressure generated within the cylinder. This process is repeated for each cylinder to gather data on all individual compression levels. The recorded pressure values are then compared to the manufacturer’s specified range. Significant deviations from these specifications can indicate issues such as worn piston rings, leaking valves, or a damaged head gasket, guiding further diagnostic or repair work.
What Issues Can a Compression Test Diagnose?
A compression test primarily identifies issues impacting an engine’s ability to maintain proper compression levels within its cylinders. Common problems diagnosed through this test include:
- Worn Piston Rings: Low compression in one or more cylinders can indicate worn or damaged piston rings, which fail to provide an airtight seal. Typical compression readings for most gasoline engines should range between 120 psi to 180 psi; values significantly below this range suggest potential wear.
- Leaking Valves: Faulty intake or exhaust valves may result in compression loss, often accompanied by poor performance or misfiring. Normal compression levels should remain consistent across all cylinders, typically within a 10-15% variation.
- Damaged Head Gasket: A blown or damaged head gasket can cause compression to drop and may also lead to cross-contamination of coolant and oil. Compression readings near zero in a particular cylinder may point toward this issue.
- Cracked Cylinder Walls or Head: Structural damage to the cylinder or cylinder head can severely compromise compression, requiring detailed inspection to confirm. Such damage can also show uneven compression between cylinders.
Understanding these conditions through a compression test provides a valuable diagnostic tool for determining the root cause of engine inefficiencies and guiding targeted mechanical repairs.
How Often Should You Perform a Compression Test?
From my experience, performing a compression test should be considered whenever you notice signs of reduced engine performance, such as misfires, rough idling, or reduced fuel efficiency. Additionally, it is a good practice to include it as part of routine maintenance every 30,000 to 50,000 miles or if you are diagnosing a potential internal engine problem. Regular testing can help identify issues early, preventing costly repairs down the line.
How to Use a Compression Tester?
- Prepare the Engine
Begin by ensuring the engine is turned off and cool to prevent damage or injury. Remove all spark plugs using a spark plug socket and disconnect the fuel system or disable the ignition system to avoid accidental engine start.
- Install the Compression Tester
Thread the compression tester’s adapter into the spark plug hole of the cylinder you wish to test. Ensure a snug, secure fit to prevent air leaks during the test.
- Crank the Engine
With the throttle fully open, crank the engine several times using the starter. Observe the gauge on the compression tester and note the highest pressure reading for the cylinder.
- Repeat for Each Cylinder
Perform the same procedure for all other cylinders, recording the pressure readings for each. Ensure consistency in the number of cranks to obtain accurate results.
- Analyze the Results
Compare the recorded readings to the manufacturer’s specifications. Significant variations between cylinders or readings below the specified range typically indicate issues such as worn piston rings, a damaged cylinder head gasket, or valve problems.
Step-by-Step Guide to Using a Compression Tester
- Prepare the Engine
Warming up the engine is a must since cold testing can give misleading results. Make sure that the ignition system is disabled by either disconnecting the ignition coil or taking out the fuel pump fuse. This will prevent the engine from starting during the test.
- Remove the Spark Plugs
All spark plugs should be taken out before carrying out compression testing for each cylinder. Ensure that the orifices for the spark plugs are free of any form of dirt so as not to introduce matter that would damage the engine.
- Fix the Compression Tester
Connect the compression tester to the first cylinder’s spark plug hole. Verify that the seal on the compression tester’s fitting is adequately tightened to avoid any air escaping during the test.
- Start Engine
Open the accelerator pedal completely enabling entire air intake, then turn the engine over about 4 to 6 times. This will sustain a peak reading set by the gauge for the cylinder.
- Record the Compression Reading
Observe and record the pressure reading displayed on the compression tester gauge. Note this value for later comparison against the manufacturer’s recommended range.
- Repeat for All Cylinders
Remove the tester from the first cylinder and repeat the process for all remaining cylinders, recording the pressure readings for each one. This allows a complete overview of compression performance across the engine.
- Analyze the Results
Compare all recorded readings to the manufacturer’s specifications. Identify any cylinders with significant compression loss or deviations, as these may indicate internal engine issues such as damaged seals, worn piston rings, or faulty valves.
- Interpret the Variations
If compression results are consistently low across all cylinders, it may point to a broader problem, such as a timing issue or worn camshaft. Conversely, low compression in specific cylinders likely indicates localized issues that require targeted repair.
- Reinstall the Spark Plugs
After completing the test, securely reinstall all spark plugs and reconnect any ignition or fuel system components previously disabled. Double-check all connections to ensure the engine can be safely started.
- Perform System Checks
Start the engine and confirm it operates normally. Address identified issues based on the compression test results, referring to a certified repair manual for detailed troubleshooting steps.
What Precautions Should Be Taken When Using a Compression Tester?
When using a compression tester, I ensure the engine is turned off and cooled down to avoid injuries from hot components. I disconnect the ignition system and fuel injectors to prevent accidental starts during testing. Before removing spark plugs, I carefully clean the surrounding area to prevent debris from entering the cylinders. Additionally, I make sure to use the correct adapter for my engine’s spark plug threads to avoid damage. Finally, I adhere to all safety guidelines outlined in the vehicle’s repair manual and wear protective gear to shield against potential hazards.
What Are the Different Types of Compression Test Kits?
Types of Compression Test Kits
Compression test kits are available in various types, each designed to meet specific engine testing needs. The most common types include:
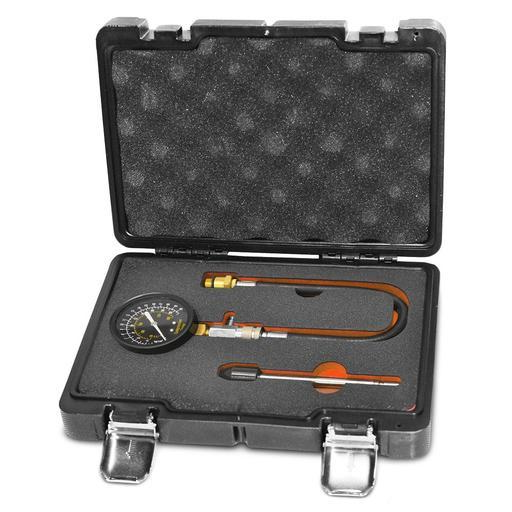
- Gasoline Engine Compression Test Kits – These kits are specifically designed for testing the compression in gasoline-powered engines. They typically include adapters for spark plug ports and flexible hoses for easy testing.
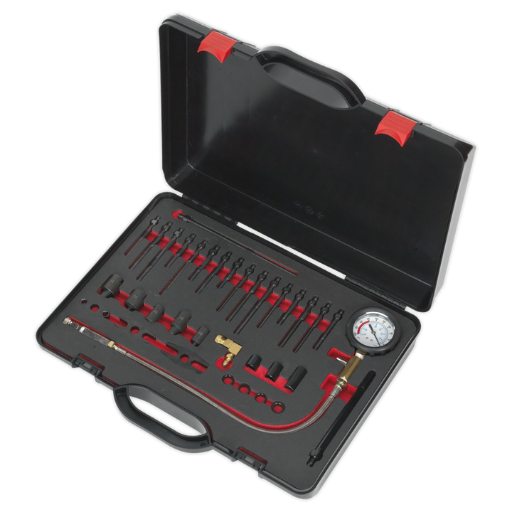
- Diesel Engine Compression Test Kits – Diesel engines require specialized kits that can withstand higher compression pressures. These kits often come with adapters for glow plug or injector ports and gauge ranges suitable for diesel-specific applications.
- Digital Compression Test Kits – Equipped with digital readouts, these kits provide greater accuracy and ease of reading compared to analog gauges. They are particularly useful in professional settings for precise diagnostics.
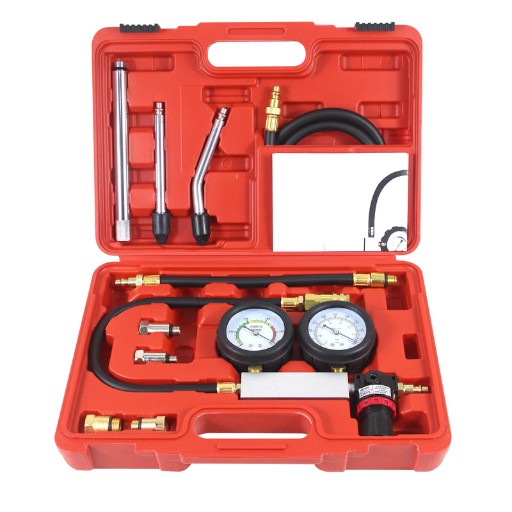
- Universal Compression Test Kits – These versatile kits include multiple adapters, making them suitable for use across a wide range of engine types, both gasoline and diesel.
By selecting the appropriate compression test kit for the specific engine type and diagnostic requirements, users can achieve accurate and reliable results during testing procedures.
Features of Compression Test Kits for Gasoline Engines
- Wide Pressure Range – Designed to measure compression levels typical of gasoline engines, usually ranging from 0 to 300 PSI.
- Rubberized Protection – Includes durable, rubber-coated gauges for shock resistance and extended lifespan.
- Flexible Hoses – Equipped with high-pressure, flexible hoses to ensure ease of access to hard-to-reach spark plug ports.
- Quick-Connect Fittings – Features quick-release connectors to simplify assembly and disconnection during testing.
- Multiple Thread Adapters – Includes various thread sizes, such as M10, M12, M14, and M18, ensuring compatibility with different engine configurations.
- Pressure Hold Function – Built-in pressure hold mechanism allows users to record and monitor the peak compression reading effectively.
- Integrated Pressure Relief Valve – Facilitates easy reset of the gauge between tests without disassembling the setup.
- Corrosion-Resistant Components – Constructed with materials to withstand prolonged exposure to oil, fuel, and other engine-related chemicals.
- Clear Gauge Readings – High-visibility, dual-scale gauges with PSI and bar units for accurate and effortless measurement interpretation.
These features ensure that compression test kits for gasoline engines deliver optimal functionality and precise diagnostics in professional and amateur applications alike.
Differences Between Diesel Engine Compression Test Kits and Gasoline Kits
The primary differences between diesel engine compression test kits and gasoline kits lie in the pressure ranges, adapters, and measurement design required to accommodate the distinct operational characteristics of each engine type.
|
Key Point |
Diesel Kits |
Gasoline Kits |
|---|---|---|
|
Pressure |
Higher (400-1000 PSI) |
Lower (0-300 PSI) |
|
Adapters |
Glow plug/injectors |
Spark plugs |
|
Design |
Robust |
Lighter |
|
Measurement |
Specialized gauges |
Standard gauges |
|
Application |
Diesel engines only |
Gasoline engines only |
How to Choose the Right Compression Test Kit for Your Vehicle?
In making a selection of the best compression test kit for your vehicle, these factors must be considered first:
- Compatibility with Engine Type: Check if your engine is diesel or gasoline as kits are usually made for one type. Don’t forget to choose a kit that corresponds with your engine type.
- Gauge Precision: Ensure that the kit has a gauge that reads accurately and is of excellent quality. A high-grade durable gauge which is simple to read may also mitigate reading errors.
- Connector and Adapter Options: Check if the kit contains the correct plugs and sockets for your make of the vehicle. While universal kits can be useful, vehicle specific kits tend to be more accommodating.
- Build Quality: Ensure you select a kit made from quality materials that can endure frequent use. Talk about attention to detail; reliability comes from the use of reinforced hoses and solid fittings.
- Additional Features: Certain kits include added features, for example, dual-scale gauges or longer hoses, that make testing easier.
- Budget Considerations: Cost is certainly important, however, do not compromise quality for a cheaper price. Strive to find the most reasonable price while still containing the essential features necessary for efficient and accurate testing.
These considerations enable you to choose the most suitable compression test kit for your vehicle’s maintenance needs.
Factors to Consider When Selecting a Compression Test Kit
1.Align your selection with the candidate’s employment that corresponds with the engine size and type, whether gasoline or diesel, for testing applicability and precision viability.
2.The stainless steel or tougher plastic used for the kit’s fabrication paints a clearer picture for enhanced performance and greater resistance against wear and tear, corrosion, and frequent usage over a period of time.
3.It is easier to diagnose a problem when there is an appropriate pressure calibration accuracy; therefore, make sure to select one that matches the barriers of highly powerful engines subjected to rigorous automotive equipment testing standards.
4.Many beginners in the industry struggle with executing proper tests; for that reason, strive to provide parts that enable easy screwing and disassembling of handles along with a matching scope for effortless reading to aid all sophisticated processes.
5.Add-ons are often overlooked when it comes to enhancing scope for no apparent reason; however, some other sets like dual gauges that are also scalable, hose extension or even cylinder type adapter sets should be welcomed.
6.Capsular organization together with a transport case that houses all components serve the purpose to promote uncomplicated movement alongside easy retrieval.
7.Self noting price quotes should match quality and features without dipping below reliability so bringing attention away from spending scrutiny alongside striping on precise layout offset due to diverging focus due to considering accuracy.
After considering these factors, you can choose a compression test kit that best suits your automotive diagnostic requirements.
Cost vs. Features: Finding the Best Compression Test Tool
To balance cost versus features for selecting the best compression test tool, consider accuracy, durability, compatibility, ease of use, included accessories, and price range.
|
Key Point |
Description |
|---|---|
|
Accuracy |
Reliable PSI results |
|
Durability |
Long-lasting build |
|
Compatibility |
Fits engine type |
|
Ease of Use |
User-friendly design |
|
Accessories |
Includes adapters |
|
Price |
Budget-friendly |
Common Problems During a Compression Test and How to Fix Them
1. Low Compression Readings
-
- Cause: Possible issues include worn piston rings, faulty valves, or a damaged head gasket.
- Solution: Perform a wet compression test by adding a small amount of oil into the cylinder. If the compression increases, worn piston rings are likely the problem. If not, inspect the valves and head gasket for damage.
- Uneven Compression Across Cylinders
- Cause: This may be due to carbon buildup, valve seat wear, or cylinder wall damage.
- Solution: Clean carbon deposits using a suitable cleaner and inspect the valve seats and cylinder walls for irregularities. Repair or replace components as needed.
- Gauge Not Holding Pressure
- Cause: A leak in the gauge, faulty connectors, or improper usage could be the reason.
- Solution: Check all connections for tightness, inspect the gauge for damage, and ensure correct usage according to the manual.
- No Compression in One Cylinder
- Cause: Common causes include a broken valve, a hole in the piston, or a complete head gasket failure.
- Solution: Conduct a visual inspection of the affected cylinder components and replace any damaged parts.
By identifying these common issues and addressing them with the appropriate steps, you can ensure more accurate compression test results and protect your engine from further damage.
What Causes Low Compression and How to Address It?
Low compression in an engine is typically caused by issues with the internal components that are critical for maintaining proper pressure within the cylinders. The primary causes include:
1. Damaged or Worn Piston Rings
-
- Cause: Over time, piston rings can wear out or become damaged, leading to leakage of combustion gases and reduced compression. Oil blow-by is often a symptom.
- Solution: Inspect and replace the piston rings. If necessary, hone the cylinder walls to ensure proper sealing with the new rings.
- Leaking Valves
- Cause: Intake or exhaust valves that are not sealing correctly—due to carbon build-up, mechanical wear, or warping—can allow gases to escape from the combustion chamber.
- Solution: Perform a leak-down test to pinpoint the issue. Clean, grind, or replace the valves and valve seats as needed.
- Blown or Failed Head Gasket
- Cause: A blowout or failure of a gasket may lead to the inadvertent leakage of gases between the combustion chamber and the cooling passages which ultimately results in a loss of compression. The warning signs are coolant mixed with oil and the engine overheating.
- Solution: Repair the head gasket, but only after confirming that the cylinder head and engine block are not warped or otherwise damaged, and if they are, should be resurfaced before replacing.
Avoiding further wear and tear to the engine or its breakdown is possible with timely actions when compression is low. Diagnosis and troubleshooting tools such as compression and leak-down testers are effective for suspected low compression. Procedures for servicing and replacing components of the engine should be done per the manufacturer’s instructions.
How to Troubleshoot a Faulty Compression Gauge?
To troubleshoot a faulty compression gauge, I first inspect the gauge for visible damage, such as cracks or loose fittings, and ensure the connections are secure. Next, I check the hose and adapter for blockages or wear that might prevent proper airflow. If the gauge readings seem inaccurate, I compare it against a known working gauge to confirm discrepancies. I also verify that the valve inside the adapter is functional and not stuck. Lastly, I ensure that the gauge is used according to the manufacturer’s instructions, as improper usage can lead to inconsistent results. If the issue persists, replacing the gauge may be necessary.
Dealing with Valve and Cylinder Issues During Testing
When dealing with valve and cylinder issues during testing, I begin by inspecting the valve for any visible signs of damage or corrosion, which could impede operation. I ensure the cylinder is securely attached and check for leaks using a leak detection solution. If I suspect internal blockages, I disassemble the valve (if permitted) and carefully remove debris or buildup. Additionally, I verify the integrity of cylinder threads and seals to ensure a proper fit. For persistent issues, I refer to the manufacturer’s manual or consult a professional technician to avoid compromising safety.
Reference Sources
-
TestResources – Compression Test: A resource providing insights into compression testing and related tools.
-
The Hull Truth – Compression Tester Tool Recommendation: A forum discussing recommendations and experiences with compression tester tools.
-
Concept GE – What are Car Diagnostic Tools?: An article explaining various car diagnostic tools, including their functionality.
-
Snap-on – Auto Diagnostic Tools & Repair: A detailed overview of diagnostic tools and their applications in automotive repair.
-
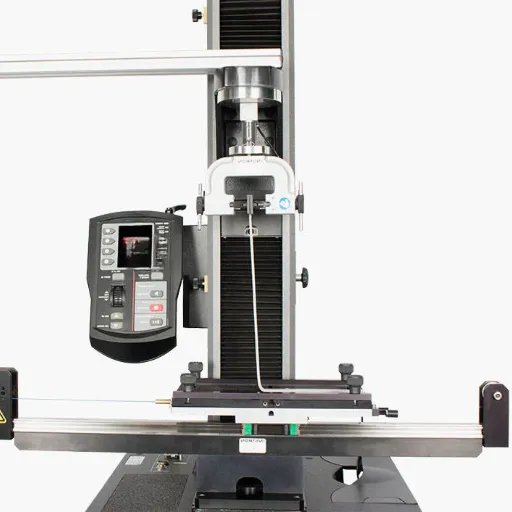
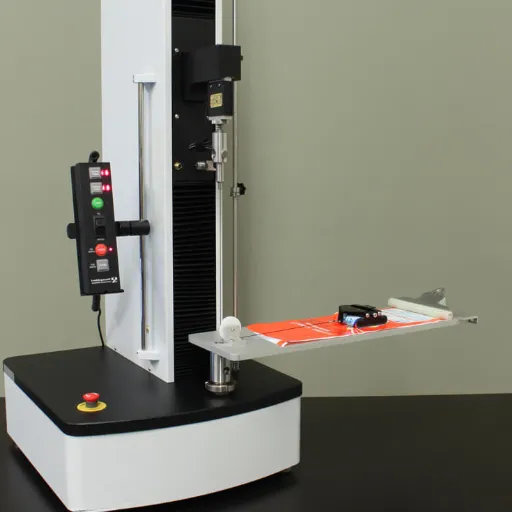
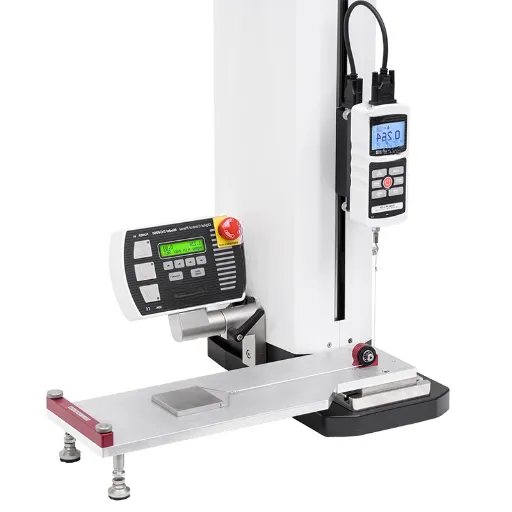
Top Compression Testing Machine in China
Frequently Asked Questions (FAQs)
Q: What is a compression test kit used for?
A: A compression test kit is used to measure the cylinder compression in an engine, helping diagnose engine health and performance issues. It typically includes a cylinder compression tester or engine compression gauge to assess if an engine is generating sufficient pressure.
Q: How do I perform a compression test on my vehicle?
A: To perform a compression test, you need to remove the spark plugs, insert the engine compression tester into the spark plug hole, and crank the engine. This will allow you to measure the cylinder compression and compare it against manufacturer specifications.
Q: How often should compression tests be performed?
A: Compression tests are performed typically when there are signs of engine trouble, such as loss of power, rough idling, or a check engine light. Regular testing can also be part of routine maintenance to ensure engine health.
Q: What do compression test results indicate?
A: Compression test results indicate the condition of the engine cylinders. Low compression in one or more cylinders suggests issues such as worn piston rings, leaky valves, or a blown head gasket.
Q: Can a compression test diagnose fuel injection problems?
A: While a compression test primarily checks cylinder compression, it can indirectly indicate issues that may affect fuel injection, such as poor cylinder sealing or valve problems. However, a specific fuel pressure test is better for diagnosing direct fuel injection issues.
Q: What’s the difference between a compression tester and an engine compression tester?
A: The terms are often used interchangeably, but generally, a compression tester can refer to any device measuring compressive strength, while an engine compression tester specifically measures the pressure in an engine cylinder.
Q: How do I know if my engine needs a compression check?
A: Signs that your engine may need a compression check include poor fuel economy, difficulty starting, a rough idle, or a check engine light. If these symptoms are present, using a compression tester automotive tool can help diagnose the issue.
Q: What tools are necessary for a compression test?
A: Essential tools for a compression test include a cylinder compression tester or engine compression gauge, appropriate adapters (such as 14mm and 18mm), and sometimes additional compression tools like quick compression release mechanisms.
Q: Can a diesel engine compression gauge be used on a gasoline engine?
A: A diesel engine compression gauge is specifically designed for the higher pressures found in diesel engines. While it might not provide accurate readings for gasoline engines, a universal testing machine or gauge tester that accommodates both can be used.
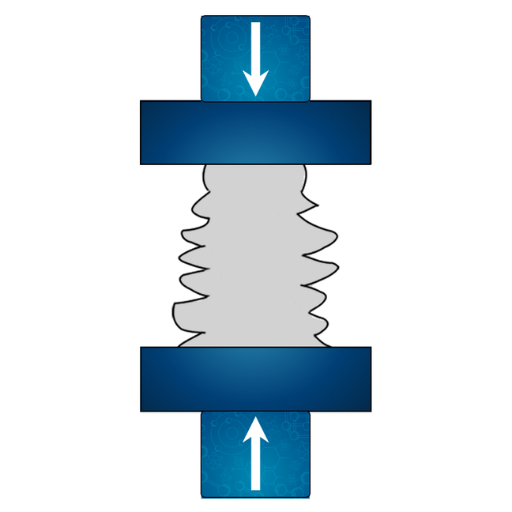
Q: How do compression platens relate to automotive compression testing?
A: While compression platens are more commonly associated with material testing in compression testing machines, understanding the principles of compressive strength can be beneficial in diagnosing engine cylinder issues during a compression test.