Ensuring the best performance for your engine is one of the keys to the life and efficiency of your vehicle. For any car enthusiast, the engine compression test is one of the most important diagnostic tools. An engine compression test is a simple procedure, but one of the most effective procedures to perform. It can provide a lot of information on the condition of your engine, such as the condition of the piston rings or the head gasket. For an experienced mechanic or a car enthusiast driver, this guide will aid you to know everything you need to know about an engine compression test. After reading this article, you will not only know how to do the test, but also understand how to analyze the test results, which will help you maintain the car in the best condition.
Understanding the Compression Test
What is an Engine Compression Test?
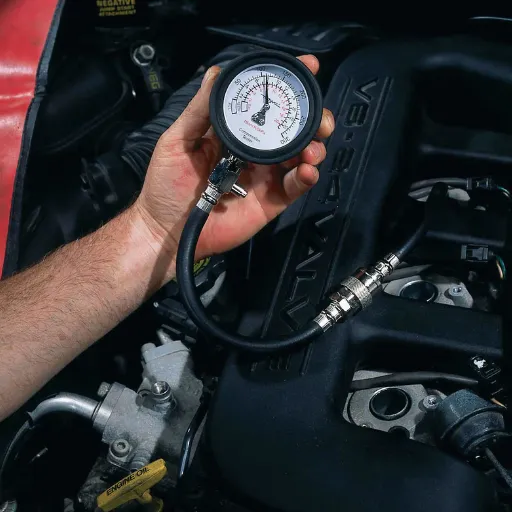
The compression test, an engine test, is designed to evaluate the pressure inside the cylinders of an internal combustion engine. This pressure is the compression and combustion of an air-fuel mixture requires proper compression for performance. This test requires removing the spark plugs, inserting a compression gauge into the spark plug openings, and cranking the engine to provide pressure readings from each cylinder.
With the aid of the compression test, the vehicle owner or mechanic can now detect the presence of expired piston rings, worn-out valves, and an old head gasket. The issues mentioned above tend to show up with the loss of power, fuel inefficiency, and frequent engine misfires. An engine in good condition should have evenly distributed compression values from all cylinders. On the other hand, abnormal variations from the readings imply the existence of mechanical components that need replacement.
Compression testing offers assistance with the diagnosis of engine issues, vehicle maintenance, and avoidance of unnecessary expenses. The test itself is simple and the result analysis provides important information regarding the state of the engine, which aids in preserving the performance of the vehicle.
The Importance of a Compression Test
Testing compression is vital to the overall well-being and functionality of an engine. Compression testing engines measure the pressure output of each cylinder. Compression testing engines help identify potential compression testing engines validate the amount of pressure that engines produce per cylinder. Using compression testing engines aide in early identification enables early identification which, in the long run, prevents expensive repairs.
Each vehicle should have an engine compression test done regularly. An engine compression test done regularly ensures that the vehicle is in good shape or if it needs any service or parts replaced. This is a very important engine test as it helps prolong the life of the engine and it helps improve the engine’s performance.
Engine compression tests are also very valuable in helping pinpoint the exact cause of an engine’s mechanical problems. For example, missing an engine should be made can be quickly determined by compression testing engines if it is due to a lack of engine compression. Therefore, compression testing engines are an invaluable tool for both the mechanics and the owners of the vehicles. They want to keep their engines in good working because it helps them avoid unnecessary costs.
When to Perform a Compression Test
Symptoms Indicating Need for Testing
A compression test can be performed after noticing symptoms that may indicate internal engine problems. Some of the more noticeable ones are a marked loss of power, rough engine idling, difficult engine start, and excessive engine smoke. Such symptoms are indicative of problems with the engine’s compression, which is crucial to the engine’s operation and performance.
Regular Maintenance Testing
It is also advisable to test for compression during every maintenance, especially when dealing with older models or ones with high mileage. Such consistent testing allows the detection of issues early on, which can be far less costly to deal with than repairs later on. This approach is effective in maintaining the engine’s performance for a longer duration.
Post-Repair Testing
In addition, after undertaking extensive repairs or modifications to the engine, compression testing should be performed. Ensuring each and every repair is completed appropriately and each engine part modified or replaced is functioning as is can be ascertained through testing. Proper testing ensures that the engine’s life, as well as performance, optimization can be ensured by confirming the appropriate compression levels.
Tools Required for a Compression Test
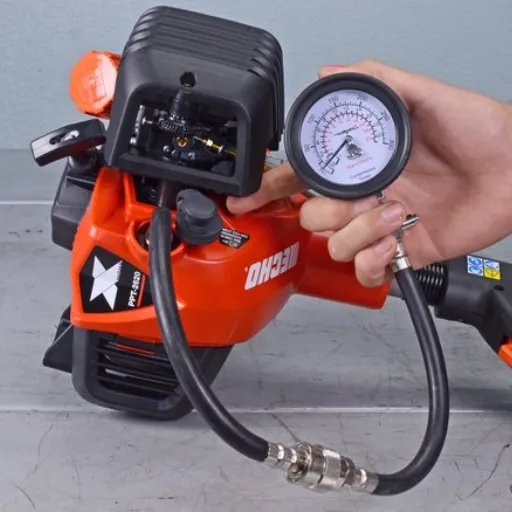
Essential Tools and Their Purposes
Performing a compression test properly for accurate engine diagnostics and maintenance requires specific equipment. Below is a compilation of such equipment and their purposes:
| Tool | Purpose |
|---|---|
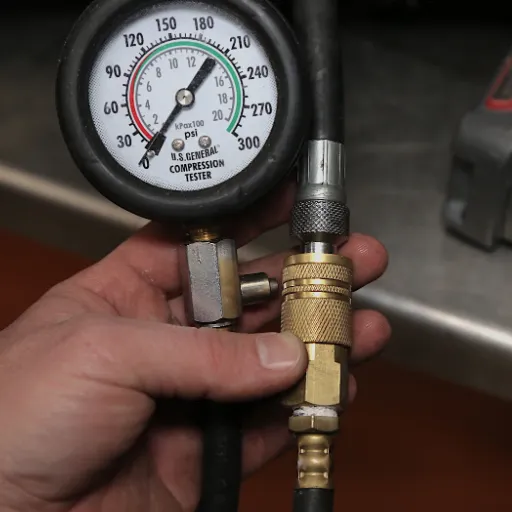
| Compression Tester | The compression tester is the key piece of equipment that allows the measurement of pressure in the engine cylinders. It is placed in the spark plug hole and provides the effective compression in pounds per square inch (psi), in addition to showing imbalances among the cylinders. |
| Spark Plug Socket and Socket Wrench | For the removal of spark plugs in each cylinder and for attaching the compression tester, a socket wrench and spark plug socket are essential. |
| Remote Starter Switch | With the use of a remote starter switch, the engine can be started and checked without pressing the ignition. This is essential in maintaining test accuracy and makes the checking process easier. |
| Safety Equipment | The use of safety gloves and goggles is the minimum safety level set for the maintenance of engine parts. It ensures the safety of the personnel and the general working environment. |
Note: Each of the tools detailed above safeguards one’s safety while performing a compression check, ensures the reliability of the check, and facilitates the entire process. An efficient compression tester makes it possible to perform uncomplicated diagnostics, and the remote starter switch and safety equipment make the process easier and safer. Having the appropriate tools and ready in advance helps in saving time, eliminates the risk of causing damage to the engine, and guarantees the accuracy of the checks.
How to Properly Use Compression Testing Tools
Careful planning and a well-defined methodology are needed in order to use compression testing tools effectively and get valid data. First, check the engine’s readiness for testing. It should be turned off and sufficiently cooled down to minimize the risk of injury and distortion of results due to excessive heat. Take out the fuel system and ignition fuses to kill the engine and stop it from starting during testing. This is fundamental for safety and for getting clear results.
After preparing the engine, take out the spark plugs to get to the cylinders that need to be tested. Put the compression tester in the spark plug hole and check that it is sealed properly so that there are no leaks. While the tester is installed, crank the engine for a short duration using the ignition key or a remote starter switch. Take note of the readings on the tester gauge as they show the cylinder’s compression level. Carry out the same procedure on all other cylinders so you can assess their uniformity and general state.
When you have all the data, review it alongside the manufacturer’s set compression values. If one or more cylinders show marked deviation in their compression values, it is an indicator of other significant issues like damaged or worn-out piston rings and valves or even a blown head gasket, all of which will need further testing and repair. Always heed the safety measures in place while conducting the test and take the extra precaution of ensuring that the connections of the testing tools are secure to avoid inaccurate diagnosis. Using the right methodology not only ensures that the data is valid but also helps to maintain the life of the engine especially if the problems are dealt with quickly.
Safety Equipment and Precautions
Safety First
A proper compression test depends on a well-designed safety protocol as well as correct protective gear to complete the test safely. When conducting tests, safety goggles must be worn at all times in order to protect the eyes from any flying debris or sudden bursts of pressure. In addition, the use of gloves is advised in order to shield one’s hands from hot engine parts and sharp objects. To reduce the build-up of fuel vapors or exhaust fumes, make fuel vapors and exhaust fumes, to reduce the build-up of fuel fuel vapors and exhaust fumes, fuel vapors and exhaust fumes to reduce the build-up of fuel fuel vapors and exhaust fumes.
Make certain that the engine has had sufficient time to cool off and is off in order to avoid injuries related to burns. To ensure that the engine does not start while testing is in progress and to prevent any injuries, fuel injectors should be disabled. For no start during testing, fuel injectors should be disabled and spark plug tapes should be removed. Have a fire extinguisher ready to address any untoward incidents.
Ensure that the compression tester is well-maintained and is appropriately attached to the engine. Observe all the given guidelines during setup and measuring. To eliminate the possibility of pressure escaping and providing false readings, make sure that all connections are sealed as tight as possible. These measures while using the correct tools not only ensure effectiveness but also the safety of the compression test.
Step-by-Step Guide to Perform a Compression Test
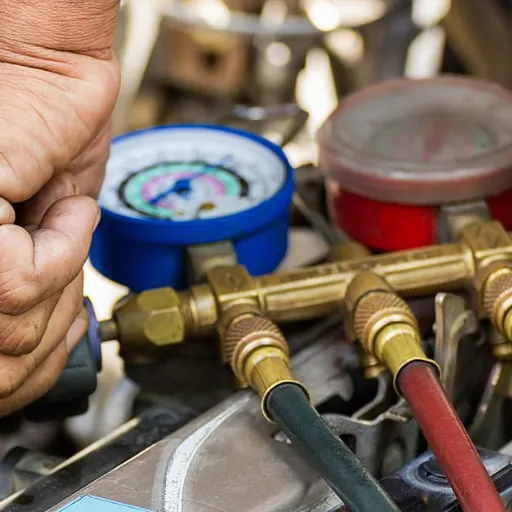
Getting the Engine Ready for Testing
Warm Up the Engine
The very first step is to prepare the engine for testing. Before starting a test, the engine must be completely warmed up. A warm engine gives a better test result as the metal parts have already expanded to their correct size, and the oil has sealed properly. Nevertheless, a warm engine means hot parts which require caution, and safety should be observed to avoid injuries or burns.
Disable Ignition and Fuel Systems
Subsequently, turn off the ignition and fuel systems to keep the engine from turning on during the test. This may be done by taking off the fuel pump relay or fuse, in addition to the ignition coils or spark plug wires. Such measures keep the test safe and under control.
Remove Spark Plugs
Conclude by taking the spark plugs out of the engine. Doing this lowers the compression resistance in each cylinder so that the starter motor can more easily turn the engine during the test. In addition, look over each spark plug to check for damage and look for unusual deposits that can be useful when making an assessment on a cylinder before conducting the compression test.
Conducting a Running Compression Test
In the real world, a running compression test is one of the most effective tools to figure out what’s wrong with an engine. First and foremost, make certain that you are following all the necessary safety measures, like wearing protective equipment and ensuring there are no combustible materials nearby. Keep in mind that the engine needs to be at its normal operating temperature as having a cold engine can skew the compression results. After your engine is warm, turn the ignition system off so the engine won’t start by itself, but make sure the engine can still turn during the test.
To conduct the test, remove the spark plug from the cylinder you want to test and attach the compression gauge to that cylinder. Now start the engine and let it idle while monitoring the gauge. The running compression should be lower than the static compression, and the proper functioning of the engine would be indicated by the same running compression across all cylinders. If there are running compression inconsistencies across cylinders, then there could be a valve leak, damaged piston rings, or cylinder wall damage.
As a next step, test the other cylinders and review the information collected for all. If the levels differ greatly for one cylinder in comparison to the others, additional testing might be necessary, such as a leak-down test or a visual check of the engine’s internal parts. Conducting static and running compression testing is a sound method to keep the engine in good shape and discover minor issues that might cause major damage in the future. Always check the manufacturer’s service documentation for detailed instructions and the correct values for your engine.
Interpreting Compression Test Results
Indicators of Proper Compression
In the process of interpreting compression test results, one must specifically look at how the measured cylinder pressures compare to the manufacturer’s set standards. Proper compression levels are compression levels that are “healthy” and fall within a defined range or threshold, set by the engine design. If all cylinders are within range and differ very little, especially within 10% of each other, then the engine is working well. Such levels of compression are proper and speak of good sealing of the cylinder head, valves, piston rings, and other components.
Identifying Issues with Low Compression
One or more cylinders exhibiting low compression could be indicative of several underlying issues. Piston rings that are worn out, head gaskets that are leaking, and even valve seals could be some of the issues causing low compression. If the engine devices with low compression exhibit symptoms like misfiring, loss of power, or even increased fuel consumption, then it is highly likely a significant cylinder will be suffering from low compression. To ensure the source of the low compression is identified, follow with a leak-down test and ascertain whether the valves, rings, or gasket is the cause.
Resolving Compression Problems
Wide variation from cylinder to cylinder or overly high compression readings call for deeper evaluation. An inflated reading could be due to excessive carbon deposits in the combustion chamber, while a big difference between cylinders might be due to mechanical damage to a certain area. Such problems should be fixed as soon as they are identified in order to prevent further engine damage. For the suitable repair steps that will restore the engine to functioning as designed, always consult the service manual.
Common Mistakes to Avoid
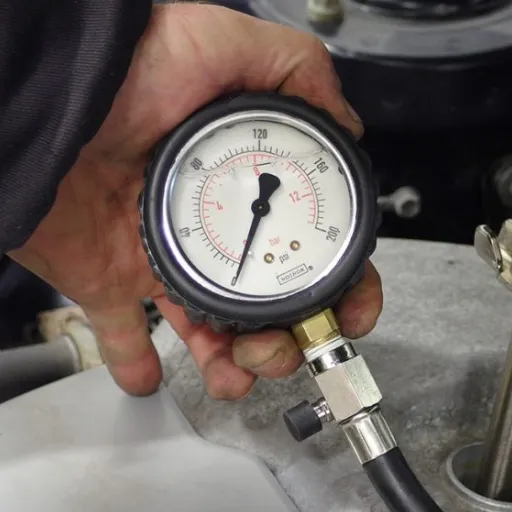
Errors in Preparing the Engine
- Cold Engine Testing: One of the most common mistakes made when preparing for a compression test is not ensuring that the engine has been sufficiently warmed up. Warmed-up engines generally provide accurate compression readings because the combustion chambers expand and seal properly. Running a cold engine, on the other hand, provides inaccurate compression readings. For accurate results, the engine should be run long enough to reach its operating temperature.
- Not Disabling Systems: Not turning off the ignition and fuel delivery systems before starting the test is another common mistake. Having these systems turned on increases the risk of fuel being delivered or ignited which can distort measurements and become a safety risk. It is important to follow the safety protocols in turning off fuel delivery and ignition systems to avoid this.
- Throttle Position Error: Furthermore, failing to open the throttle fully during the test is an important omission. With the throttle partially or fully closed, airflow into the engine is restricted, which produces lower compression readings than the engine’s actual capability. For correct evaluations, the throttle must be fully open during tests to permit the greatest engine air intake.
Misuse of Compression Testing Tools
Incorrect use of compression testing tools will lead to errors in engine diagnostics. One such error, and also one of the most common, is the use of a damaged or poorly calibrated gauge. Not only is faulty equipment frustrating to work with, but it can also display misleading information, which may lead to technicians either ignoring an important problem or attempting to fix a problem that doesn’t exist. For trustworthy outcomes, verifying that the test equipment is functioning correctly is a must.
Using the wrong adapter to connect the tool with the engine is another common mistake. Compression testers typically include several adapters to accommodate different engine styles. An adapter that fails to provide a proper seal will cause leakage, which reduces the compression values and distorts the readings. Conducting the test always requires confirming the compatibility of the adapter with the engine as well as ensuring that it is firmly attached.
Finally, overlooking the maintenance of the compression testing tool is a grave error. This also involves failing to check and replace worn-out parts like O-rings or hoses. Slow deterioration can impact the tool’s capability to operate as intended, which in turn affects the validity of the readings. To ensure the device remains precise and dependable, it should be examined, cleaned, and stored in compliance with the manufacturer’s guidelines. For accurate engine diagnostics, compression testing tools must be used and maintained properly.
Tips for Accurate and Reliable Results
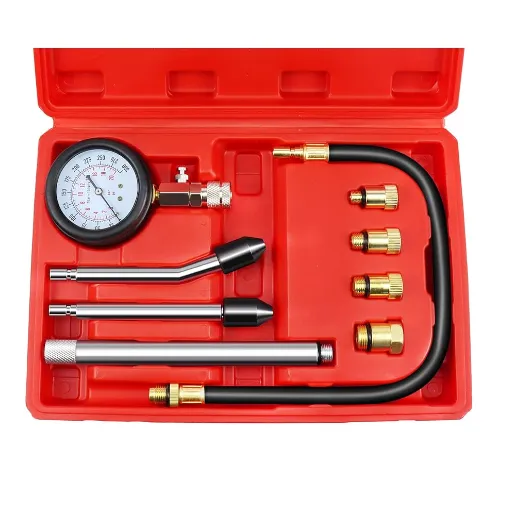
Best Practices for Performing a Compression Test
A compression test is a performance and diagnostic test that is usually run on engines. It tests the pressure each cylinder generates during its compression stroke, enabling the identification of issues such as worn piston rings, blown head gaskets, and faulty valves. For valid and reliable results, certain procedures must be followed.
Preparing for the Test
Make sure the engine is at operating temperature, as a warm engine offers the best results. Disconnect the ignition or fuel system so that the engine cannot start during testing. Obtain all the necessary tools, such as a compression gauge and the right adapter for your engine’s spark plug threads. To prevent dirt from entering the plug holes, clean the area around the spark plugs.
Performing the Test
Take out the spark plugs so the engine can turn over without load and offer consistent compression. Place the compression gauge in the first cylinder and crank the engine a few times, about 4-6 revolutions, with the throttle fully open to the engine. Note the pressure reading on the gauge and repeat the procedure for the other cylinders. Testing should be performed for all cylinders under the same conditions to ensure the results are consistent and comparable.
Interpreting the Results
Identify the compression readings and relate them to the expected range stipulated by the manufacturer. Confirm whether or not greater disparities between cylinders exist. Each cylinder should have similar pressures, with no more than 10-15% difference between the lowest and highest readings. Any significantly lower reading cylinders should be tested, with more diagnostics like the leak-down test to isolate the problem.
Important: In doing these steps, it is possible to carry out the compression test in the best way and obtain trustworthy data of the engine condition.
Maintaining Consistency in Testing
Compression tests must be carried out for each test in order to attain and sustain quality procedures and dependable conditions. Tests performed on engines that have not attained the recommended operating temperature are likely to have inaccurate results. Therefore, ensure that the engine is at the recommended operating temperature. Also, for the safety and effectiveness of the test, turn off the ignition and the fuel systems to avoid the engine from starting while the test is being conducted.
Variations in test results are likely to occur if there is use of different tools for testing different cylinders, and hence the same compression gauge should be used for all the cylinders. Each test should be carried out with the gauge in a good position since a weak attachment leads to weak or erratic pressure indications. Also maintain the same timing of 4-6 revolutions or until the gauge needle normalizes for each cylinder as this helps to maintain uniformity.
Also, make sure that all the readings are recorded in an organized manner and are verified against each and every cylinder. The readings are supposed to be closely grouped and display less than a 10-15% variation between the highest and lowest values. Adhering to this testing protocol ensures that following these guidelines will enable proper evaluation of an engine’s health as well as detection of any cylinders for which further inspection is warranted.
What to Do if Results Are Inconsistent
Double-Check Process and Equipment
Start out by double-checking the process and equipment. Ensure that the testing device is working properly and that all connections are secure during the readings. During the read, a faulty gauge, improper setup, or human error can contribute to inaccurate results, so retesting to verify the results is pertinent. Also maintain uniformity of conditions of tests such as the engine being at the operating temperature and the removal of all spark plugs.
Inspect Components for Problems
After ensuring the consistency of the testing procedure, the cylinder and other components should be checked for problems. Piston rings, valves, or head gaskets that are worn out or damaged are common cause of low and different compression. Identify the problem with the piston rings or other areas by doing a wet compression test. Add a small amount of oil and redo the test. If the compression improves, the problem is most likely the rings, however, if the compression remains the same, the problematic area is most likely the valve seals or head gaskets.
Seek Professional Help When Needed
To summarize, if significant problems arise, one should immediately schedule professional inspection or repair. Early inconsistent results can be addressed to prevent drastic engine damage and to maintain performance. Ensure documentation of your findings as well as proper communication to a mechanic, in case outside help is required. Persistent low results on a particular cylinder may need advanced diagnosis, such as the use of a leak-down tester to find the precise
Frequently Asked Questions (FAQ)
A compression test is a specific type of diagnosis test that tells us about the compression ratio of the individual engine cylinders. It matters because it gives us an insight into the issues of an engine and helps us deliver worn piston rings, old cylinder heads, and valve timing issues, among other problems.
First, ensure the diesel engine is warm. Next, deactivate the fuel pump and ignition system to stop the engine from running while testing. Finally, in order to measure the cranking compression accurately and to ease the cranking process, remove the glow plugs.
Yes, a compression test can be conducted with the use of an engine compression tester. While there may not be a use of special tools, the method is more streamlined and more accurate with the use of a pressure gauge.
Worn piston rings or a blown gasket can result in a reduced compression. If the compression is below 125 to 175 psi, which is the normal range, you should perform further diagnostic testing. You should first check the compression of each cylinder.
Verify the achievement of accurate cranking compression values by cranking the engine for 10 seconds per cylinder in the course of the compression test. This time period is crucial to perform the test effectively.
To ensure proper and safe testing, it is required to turn off the fuel system. This fuel system shutdown prevents the engine from running. In order to shut off fuel, food pumps can be unplugged, or the fuel supply to the system can be disabled.
Checking compression on a gas engine requires following the same steps as those for a diesel engine. This means making sure the engine is warm, disabling the fuel pump, and turning off the ignition system. After that, remove the spark plugs and use a compression tester to check the pressure in each cylinder.
There are a lot of factors that can influence the outcome of a compression test, such as the condition of the engine oil, the timing of the valves, and whether the engine is running. Also, for the purpose of chacking accuracy, it must be ensured that all cylinders are tested under identical conditions.
It is important to note the readings of each cylinder after the test. There should be similar compression values from all cylinders in a healthy engine. Later on, there should be an engine inspection to pinpoint the exact problem if there is a significant difference out of the compression values.
References
-
How to Do an Engine Compression Test – AutoZone
Provides a step-by-step guide for performing an engine compression test. -
Compression Test – TestResources
Covers static compression testing methods and their applications. -
Compression Testing 101 – MTS
Discusses the fundamentals of compression testing, including key material properties measured.

